 Halo Light
Halo Light
Halo Light
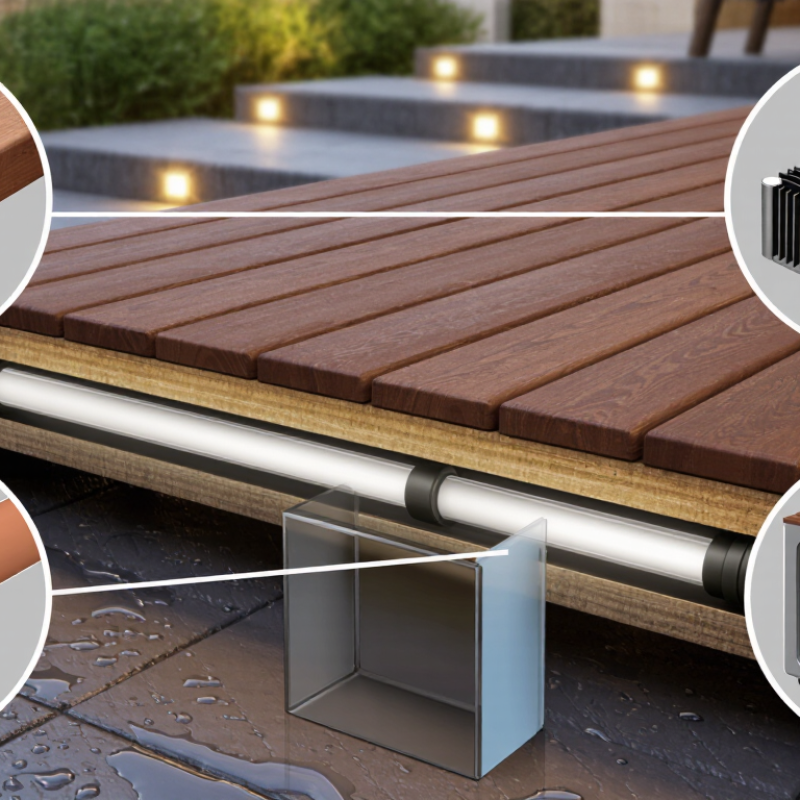
As outdoor lighting expands, buyers are asking how to waterproof led strip lights before installing them under decks, signs, and garden steps. The question is practical, not cosmetic. Water can enter through cut ends, loose connectors, cracked silicone, or poorly sealed power supplies. One small gap may darken an entire run.
Industry data supports careful product selection. Grand View Research identifies LED lighting as a major global growth sector, driven by energy efficiency, smart controls, and broader outdoor use. MarketsandMarkets also reports continuing demand for flexible LED strips in commercial, residential, and architectural applications. However, market growth does not guarantee waterproof performance. Product claims still require verification.
This guide uses IEC 60529 ingress protection principles to explain ratings such as IP65, IP67, and IP68. IP65 generally protects against water jets, while IP67 addresses temporary immersion under defined test conditions. These ratings apply only to tested components and conditions. A connector may not match the strip’s rating. That detail is easy to miss.
Real installation experience matters here. A strip placed beside a pool faces different risks from one installed beneath a covered balcony. Buyers should inspect the jacket material, adhesive backing, cut marks, end caps, connectors, voltage, and heat dissipation. The U.S. Department of Energy’s solid-state lighting research also emphasizes thermal management as a key factor in LED life and performance. Waterproofing alone cannot prevent overheating.
Some recommendations remain imperfect. Manufacturers may use different testing language, and field conditions rarely match laboratory tests. Therefore, this 2026 buyer-focused guide combines published standards, industry research, and practical inspection steps, helping readers choose protection that fits the location rather than trusting a bold label alone.
2026 Top How to Waterproof LED Strip Lights for Buyers?
Waterproof Ratings and Protection Levels for LED Strip Lights
A waterproof LED strip needs the correct IP rating for its installation area. IP44 handles light splashes, but it is unsuitable for exposed rain. IP65 resists dust and water jets, making it practical under covered outdoor spaces. IP67 allows temporary immersion, usually up to one meter for thirty minutes. IP68 offers deeper or longer protection, but its exact limits depend on testing conditions.
The strip coating is only part of the protection. Connectors, cut ends, and power supplies often become the weakest points. Silicone tubing can protect against rain, yet trapped moisture may still cause corrosion. Seal every cut end with a compatible end cap and waterproof sealant. Keep the power adapter inside a dry, ventilated enclosure. Do not bury it without checking its rated use. Heat also matters, because excessive heat can shorten LED life despite a high IP rating.
Tips: Match the rating to the real environment, not the product photo. Check for salt spray, standing water, and cleaning chemicals. Inspect seals after harsh weather. Replace cracked tubing quickly. A higher IP number is not always better; sealed strips may release heat poorly. This detail is easy to overlook. Test the complete installation before permanent mounting, and leave drainage paths where water could collect.
| IP Rating | Protection Level | Water Resistance | Typical LED Strip Construction | Suitable Locations | Important Buyer Considerations |
|---|---|---|---|---|---|
| IP20 | No protection against water; limited protection against solid objects larger than 12.5 mm. | Not water-resistant. | Bare LED strip with exposed components and circuit board. | Dry indoor areas such as bedrooms, offices, cabinets, and ceiling coves. | Keep away from condensation, splashes, steam, and direct contact with liquids. Use an aluminum profile or diffuser for mechanical protection, but do not treat it as waterproofing. |
| IP44 | Protection against solid objects larger than 1 mm and water splashes from all directions. | Splash-resistant, but not suitable for water jets or immersion. | Usually protected by a light coating, sleeve, or covered housing. | Dry or lightly humid indoor areas, including some decorative installations away from direct spray. | Confirm that connectors, solder joints, power supplies, and strip ends have the same protection level. |
| IP54 | Dust-protected and protected against water splashes from any direction. | Suitable for occasional splashes; not designed for water jets or immersion. | Partially sealed strip or protective coating over the components. | Indoor kitchens, covered patios, sheltered displays, and areas with moderate dust or humidity. | Avoid exposed outdoor locations, pooling water, pressure washing, and installations where water can remain on the strip. |
| IP65 | Dust-tight and protected against water jets from any direction. | Jet-resistant; not rated for temporary or continuous immersion. | Commonly silicone-coated or enclosed in a flexible waterproof sleeve. | Covered outdoor areas, bathrooms away from direct immersion, kitchens, signage, and exterior accent lighting. | Seal every cut end and connector. Do not place the strip in a pool, fountain, gutter, or location where water can collect. |
| IP66 | Dust-tight and protected against powerful water jets. | More resistant to strong spray than IP65; still not rated for immersion. | Heavier sealing, reinforced sleeve, or robust molded waterproof housing. | Exposed outdoor areas, building facades, vehicle exteriors, and locations subject to heavy rain or cleaning spray. | Check mounting methods and heat dissipation. Continuous exposure to sunlight, chemicals, or salt water may require additional material verification. |
| IP67 | Dust-tight and protected against temporary immersion in water. | Typically tested for immersion up to 1 meter for up to 30 minutes under specified test conditions. | Fully encapsulated strip, sealed tube, or sealed profile system. | Wet rooms, outdoor ground-level features, areas exposed to temporary flooding, and decorative water-adjacent installations. | The complete assembly must be rated IP67, including end caps, cable exits, connectors, and power connections. |
| IP68 | Dust-tight and suitable for continuous immersion under conditions specified by the manufacturer or test documentation. | Designed for prolonged or continuous immersion; depth, duration, temperature, and installation limits vary. | Fully sealed, molded, or pressure-resistant construction with dedicated waterproof connections. | Pools, fountains, submerged architectural lighting, marine-adjacent installations, and other permanently wet environments when specifically approved. | IP68 does not define one universal immersion depth or time. Request the exact test conditions and verify compatibility with chlorine, salt water, chemicals, and temperature. |
| Buyer Checklist: Select the IP rating according to the actual exposure level, seal all cut ends with compatible end caps and waterproof sealant, keep low-voltage power supplies away from water, provide suitable heat dissipation, and confirm that the complete installed system—not only the LED strip—is tested to the stated rating. | |||||
IP classifications are based on IEC 60529 test principles. The second digit describes water protection, while the first digit describes protection against solids and dust. Actual performance depends on installation quality, connectors, end seals, power supplies, chemicals, temperature, and mechanical damage.
Start with the environment. A bathroom ceiling may need splash protection, while a garden path faces rain, dust, soil, and temperature changes. Check the IP rating and sealing quality.
IP65 suits surface splashes. IP67 and IP68 provide stronger protection for wet locations. Check the product’s specific conditions; an IP rating cannot protect an unsealed connection.
Measure the installation length. Confirm voltage, wattage per metre, colour temperature, and cutting intervals. Test a short section first; it may reveal glare or uneven colour.
Voltage drop can reduce brightness along a long run. Power injection may help. Check the power supply’s capacity and leave a practical safety margin.
Cut only at marked lines and keep copper pads clean and dry. Solder wires carefully or use a correctly sized connector. Seal joints with adhesive-lined heat-shrink tubing.
Fit a silicone end cap and fill its cavity with neutral-cure sealant. Leave no air gap near the cable entry. Let the sealant cure fully before testing.
Often, no. Dusty, rough, or hot surfaces can weaken it. Use a clean mounting surface, and consider an aluminium channel to help manage heat.
Inspect each joint under bright light. Test with low-voltage power, then use a gentle water spray. A surface can feel dry while sealant underneath remains soft.
Add a drip loop and keep the power supply elevated. Avoid tight bends, which can damage the coating or circuit. Recheck seals after temperature changes.
This guide explains how to waterproof led strip lights safely and effectively for indoor and outdoor applications. It begins by comparing waterproof ratings and protection levels, helping buyers understand the difference between moisture resistance, splash protection, and full water protection. It then shows how to select the right LED strip according to the installation location, exposure conditions, brightness needs, and power requirements. Before installation, readers will learn how to prepare the strip, mounting surface, connectors, cables, and power supply to reduce the risk of moisture damage.
The article also presents practical, step-by-step methods for sealing LED strip connections, including careful use of waterproof connectors, heat-shrink materials, and protective coverings. Finally, it explains how to test the lighting system before installation, mount it securely, protect exposed joints, and maintain it through regular inspections. By following these steps, buyers can improve safety, extend service life, and achieve reliable lighting performance in damp or demanding environments.
