Halo Light
Dim LED strip lights can turn a bright kitchen counter or desk into a patchy, dull space. The change may happen gradually, or appear suddenly after you move a connector or add more lights. The cause is not always a failing strip. A loose connection, weak power supply, dimmer setting, or voltage drop along a long run can all reduce brightness. Small details count.
If you are wondering how to fix dim led strip lights, a careful check can help narrow down the problem before you buy replacements. Look for uneven brightness, flickering, warm connectors, or a power adapter that does not match the strip’s voltage and wattage requirements. Turn off and unplug the power before inspecting connections. Never force a plug or exceed the adapter’s rated load.
This guide covers five practical fixes, from checking the power source and connectors to adjusting the dimmer and addressing voltage drop. Start with the simplest checks, and change one thing at a time. That makes the results easier to understand. Not every strip is installed the same way, though; product instructions and wiring layouts matter. If a connector looks damaged, a supply becomes unusually hot, or you are unsure about the wiring, stop and seek qualified help. A quick fix should not create a bigger problem.
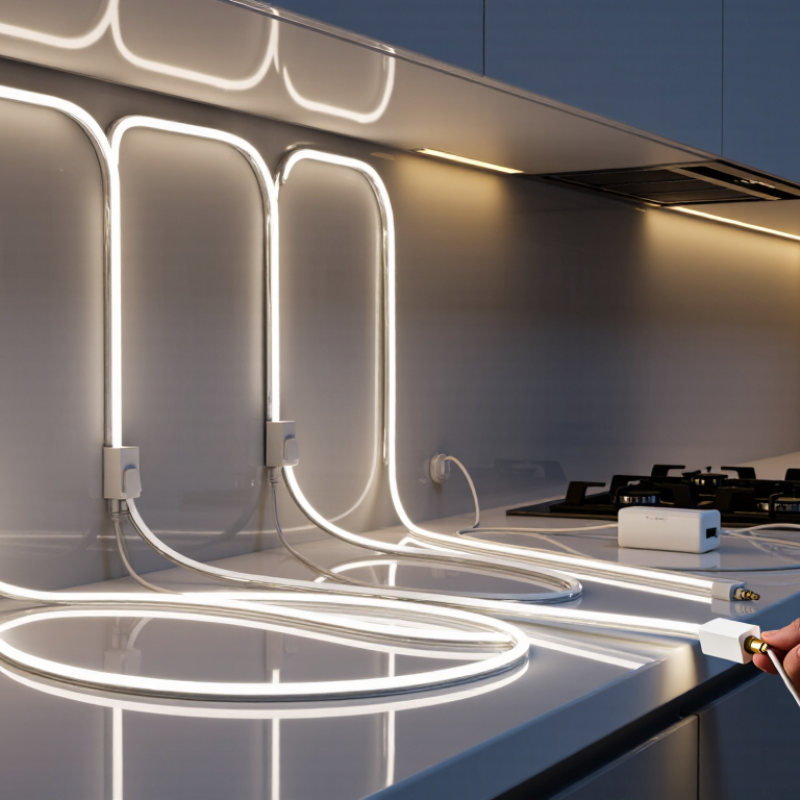
A dim LED strip does not always mean the strip itself has failed. Check the power supply label and compare its output voltage with the voltage printed on the strip or its packaging. They must match. A 12-volt strip needs a 12-volt supply; a higher voltage can damage the LEDs, while a lower one may leave them noticeably dim. Read the label carefully. It is easy to confuse input voltage with output voltage.
Current capacity matters too. The supply’s rated current should meet or exceed the strip’s requirement, especially for a long installation. For example, a strip that draws 3 amps needs a supply rated for at least 3 amps at the correct voltage. More capacity is generally fine; the strip draws the current it needs.
Check the connector polarity and make sure the plug is fully seated. A loose connection can cause flickering or dim sections. Turn the power off before adjusting wiring. Look for a warm adapter, bent pins, or darkened contacts, but do not open the supply. One small detail can be easy to miss: a long cable may also cause voltage drop, so the far end can look dimmer even when the supply label is correct.
A dim strip may have a wiring problem, not a failed LED. Switch off the supply before touching connectors. Check that the strip’s positive and negative pads match the controller output. A reversed connection often stops a strip from lighting; a loose contact may cause flickering or uneven brightness. Look closely for lifted copper pads, cracked solder, and connectors that slide off with a gentle tug. Small details matter.
Check the cable run, too. IEC 60228 lists a maximum resistance of 12.1 Ω/km for 1.5 mm² copper conductors at 20°C. In a 5-metre run, the outgoing and return wires total 10 metres. At 5 amps, that resistance could cause about 0.61 volts of drop, before losses in the strip itself. That is noticeable on a 12-volt system. Longer runs and thinner wires can make the far end look duller.
Measure voltage at the strip’s input, not only at the power supply. A difference points toward cable, connector, or contact resistance. Use a meter only if you can test safely; otherwise, ask a qualified electrician. And don’t trust appearance alone. A joint can look tidy and still be unreliable.
| No. | Inspection Area | What to Check | Typical Sign | Practical Fix |
|---|---|---|---|---|
| 1 | Strip connections | Check solder joints, clip-on connectors, and the connection between strip sections. Look for loose contacts, corrosion, or damaged copper pads. Disconnect power before handling the strip. | Flickering, intermittent brightness, or a section that is dimmer than the rest. | Reseat compatible connectors or remake damaged joints. Ensure the connector contacts align with the strip’s copper pads and are firmly secured. |
| 2 | Polarity and orientation | For DC strips, match the power supply’s positive and negative terminals to the markings on the strip. On RGB or other multi-channel strips, also align the channel labels. | The strip does not light, a color channel is missing, or the lighting behaves unexpectedly. | Switch off power, verify the polarity markings at both ends, and reconnect the wires correctly. Do not rely on wire color alone. |
| 3 | Power-supply voltage and capacity | Confirm that the supply’s DC output voltage matches the strip rating, such as 12 V or 24 V. Check that its rated wattage can support the total strip load. | The whole strip is dim, or brightness drops when more of the strip is switched on. | Use a correctly rated, regulated supply. Estimate load as strip watts per metre multiplied by the installed length, and allow capacity headroom according to the strip and power-supply specifications. |
| 4 | Wire length and voltage drop | Inspect long or thin power leads and measure voltage at the strip’s input while it is operating. Compare the reading with the strip’s rated voltage and the supply output. | The end nearest the supply is brighter than the far end, especially on long runs. | Use suitably sized conductors, shorten the feed where practical, or add power feeds at appropriate points. Follow the strip manufacturer’s limits for run length and injection spacing. |
| 5 | Wiring and controller connections | Check for loose terminals, broken conductors, damaged insulation, and incorrect connections through a dimmer or controller. Verify that the controller supports the strip’s voltage and type. | Uneven brightness, color changes, or dimming that occurs only when a controller is connected. | With power off, secure or replace damaged wiring and confirm each terminal is connected to the correct input or channel. Test the strip with a compatible supply to help isolate a controller fault. |
Long LED strip runs can look bright near the power supply and noticeably dim at the far end. This happens because the strip’s copper paths and connecting wires resist electrical flow. The resulting voltage drop becomes more visible over distance, especially at higher brightness. A quick check with a multimeter can help: compare the voltage at the supply end with the voltage at the dim section. Measure carefully, and follow the strip’s specified voltage. Small differences matter.
For a long run, feed power at more than one point instead of relying on the strip’s narrow copper tracks to carry current end to end. You can connect a suitable supply to both ends, or add a power feed near the middle. Use wire sized for the current and distance, and keep connections secure. Power must be off while wiring. A thicker wire may reduce loss, but it will not fix an undersized power supply or a poor connector. I’ve seen the connector be the weak spot. Easy to miss.
Tips: Keep the power supply close to the strip when practical. Check polarity before reconnecting, and don’t exceed the strip’s rated voltage. If the far end still looks dim, test each section separately; the strip itself may have uneven LEDs or a damaged track.
A dim LED strip may only need a setting change. Start with brightness. Use the controller or remote to raise the output gradually, rather than jumping straight to maximum. Check for a dimmer dial near the power supply; turn it slowly and watch the strip. Some controllers remember a low setting after power is restored, while others switch modes. A color or scene mode can also make the light seem weaker than steady white. Small changes matter.
Tips: Point the remote at its receiver and replace weak batteries if commands seem inconsistent. Check that brightness is not limited in an app or wall dimmer. If the controls are unclear, test one setting at a time and note what changes.
If adjusting the controls has no effect, switch off power before checking accessible connectors. A loose connection can cause uneven brightness, but avoid handling exposed wiring. Make sure any external dimmer is designed for the strip’s controller and power supply; incompatible controls may flicker or fail to dim smoothly. I’ve found that settings can be confusing, and a reset may erase a preferred color or scene. Try it only after recording the current setup.
SAFETY Before replacing a dim LED, unplug the strip’s power supply. Let it cool, then inspect the dim area under steady room lighting. Look for browned spots, cracked coating, loose copper pads, or LEDs that flicker when the strip is gently moved. A single weak LED may indicate local damage, but dimness across a whole section can point to a failing connection or power issue. Keep it unplugged. Check the strip’s printed voltage and cut marks before choosing a replacement. Matching appearance alone is not enough.
If the strip has marked cut points, remove the damaged section only at one of them. Use compatible connectors or solder only if you can make clean, secure joints without bridging the copper pads. Match polarity carefully. Do not guess. Replace the section with the same voltage, LED type, and approximate density, then test it briefly before pressing it onto the surface. A stubborn dark patch can be hard to diagnose; sometimes the connector, not the LEDs, is at fault. For sealed or waterproof strips, cutting may damage their protection, so replacing a longer section can be more reliable. Reattach the strip to a clean, dry surface, and avoid covering it while testing.
Compare the power supply’s output voltage with the voltage printed on the strip. They must match. A lower supply voltage can make the lights dim.
Yes. Its rated current should meet or exceed the strip’s requirement. For a strip drawing 3 amps, use a supply rated for at least 3 amps at the correct voltage.
A long cable can cause voltage drop, even when the supply voltage is correct. Check the cable and connectors. It’s easy to miss.
A loose plug, bent pin, or darkened contact can interrupt power. Turn power off before checking accessible connections. Do not open the power supply.
Raise brightness gradually and check for a dimmer dial, app limit, or color mode. Some scenes look weaker than steady white. Small changes matter.
Point it toward the receiver and replace weak batteries. Test one setting at a time. A reset may erase saved colors or scenes, so note them first.
Unplug the supply and let the strip cool. Look for browned spots, cracked coating, loose copper pads, or flickering LEDs. Keep it unplugged while inspecting.
Cut only at marked points, and match voltage, LED type, density, and polarity. Test the new section briefly before mounting it. Do not guess.
Cutting may damage its protective seal. Replacing a longer section may be more reliable. Sometimes the connector, not the LEDs, causes the dark patch.
Dim LED strip lights are often caused by a power supply that cannot provide enough power or does not match the strip’s voltage requirements. Begin by checking the power source and confirming that its output is compatible. Then inspect connectors, polarity, and wiring for loose, reversed, or damaged connections, since even a small fault can reduce brightness or interrupt power.
For longer installations, voltage drop may make the far end appear dimmer. Reduce this effect by shortening the run or improving how power is supplied along the strip. Also review dimmer and controller settings to ensure brightness is not limited by an adjustment or incorrect configuration. If sections remain dim after these checks, individual LEDs or parts of the strip may be damaged and need replacement. Following these steps is a practical way to learn how to fix dim led strip lights and restore more even illumination.