Halo Light
Maintaining LED lighting systems is more than replacing a failed lamp. It involves inspection, cleaning, testing, documentation, and informed decisions. A dusty warehouse fitting can lose useful light before it stops working. A loose connection can create flicker, heat, or repeated driver failure. Small warning signs deserve attention.
Lighting expert James R. Benya offers a practical principle: “Good lighting design is not complete until the system can be operated, maintained, and measured.” That idea guides this introduction to how to maintain LED lighting systems. Reliable maintenance begins with a clear record of each fixture, driver, control unit, installation date, and warranty condition. Without records, even experienced technicians may guess.
Look closely.
A sensible routine includes checking lenses for yellowing, inspecting heat sinks for blocked airflow, and confirming that mounting points remain secure. Controls should also be tested, especially occupancy sensors, dimmers, timers, and emergency functions. Use the manufacturer’s procedures and suitable electrical test equipment. Never assume a dark fixture has a failed LED module; the driver, wiring, control signal, or power supply may be responsible.
The following ten tips focus on practical service work. They address cleaning methods, thermal management, voltage checks, driver replacement, surge protection, visual inspections, and maintenance scheduling. Some systems will need more frequent attention than expected. That is an honest limitation. Dust, humidity, vibration, and operating temperature vary widely between sites. A checklist helps, but it cannot replace judgment. Record what was found, question unusual patterns, and improve the routine after every inspection.
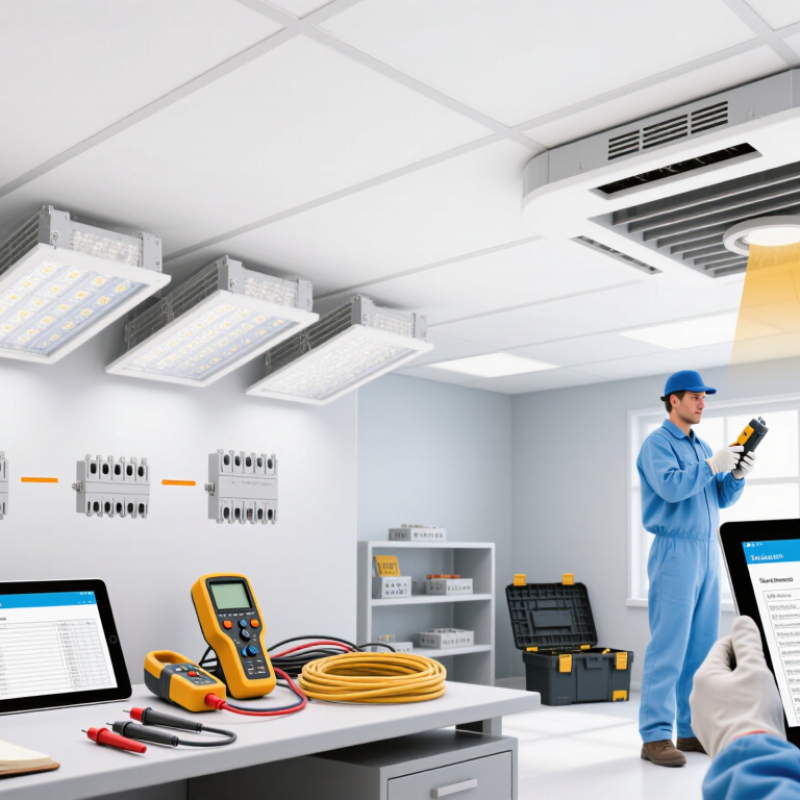
The U.S. Department of Energy identifies LED lighting as using about 75% less energy than incandescent lighting. Treat this figure as a planning benchmark, not a guaranteed result. Record each fixture’s wattage, operating hours, and measured light level before changing equipment. A simple spreadsheet can reveal unusual energy use.
During routine inspections, check for flickering, dark spots, loose connections, and dusty lenses. Dust can reduce usable light, even when the LED still operates. Clean fixtures with a dry, soft cloth and follow the manufacturer’s safety instructions. Keep heat vents clear. Excessive heat may shorten component life.
My first baseline was incomplete. I recorded energy use but ignored daylight entering through nearby windows. That distorted the comparison. A better review includes time of day, occupancy, controls, and seasonal conditions. Compare monthly electricity readings with the original figures. If savings fall below the DOE benchmark, investigate operating schedules before replacing healthy fixtures.
Do not judge performance by brightness alone. Measure illumination in the actual work area. Replace damaged drivers promptly, and document every repair. Consistent records support reliable maintenance decisions and expose gradual performance loss. Some systems will not reach 75% savings, especially where controls remain poorly adjusted. That limitation deserves attention.
Routine inspection catches small LED faults before they create dark aisles or unsafe work areas. Begin with the lens, using a clean, dry microfiber cloth to remove dust, insects, and oily film. Look for yellowing, hairline cracks, clouded surfaces, or water marks around the rim. These details can signal heat, moisture, or a failing seal. Do not ignore dim patches. Compare several fittings under the same operating conditions.
Drivers deserve equal attention. A driver may feel unusually hot even when the lamp still works. Listen for buzzing, check delayed start-up, and watch for repeated flickering. Use a non-contact thermometer when available, and record temperatures beside the fitting number. Never open energized equipment. A qualified technician should test voltage, current, and insulation safely. A small notebook often reveals patterns that memory misses.
Inspect wiring for brittle insulation, loose terminals, discoloration, and cable strain near joints. One loose terminal can create heat. Check controls too, including sensors, timers, dimmers, and manual switches. Confirm that lights respond correctly at different times and brightness levels. I once dismissed occasional flicker as a control issue, but a loose connection caused it. That mistake changed my practice. I now photograph suspicious areas and verify every repair after several operating cycles. Some faults remain intermittent, so a single successful test may not prove the system is healthy.
Clean LED fixtures carefully to preserve light output and thermal performance. Accumulated dust can scatter light and create dark patches on floors or work surfaces. In routine inspections, I have seen fine particles settle around vents and heat sinks. The fixture still looked bright, but its housing felt unusually warm.
Turn off the circuit and let the fixture cool completely before cleaning. Confirm it is de-energized when conditions require electrical access. Use a soft, lint-free cloth or a clean, dry brush for loose dust.
Never spray liquid directly onto the fixture. Moisture can enter seals, connectors, or ventilation openings. For sealed fixtures, follow the manufacturer’s cleaning instructions and use only approved solutions.
Wipe lenses gently, without pressing grit across the surface. A damp cloth may remove oily residue, but it should be barely moist. Avoid abrasive pads and household solvents. After cleaning, check vents for blocked dust and inspect discolored wiring or cracked covers.
Record the date and any unusual heat or flicker. I once delayed a cleaning because the light output seemed normal. That decision was not ideal; heat buildup can develop before brightness visibly changes. Regular, careful checks provide better evidence than appearance alone.
Heat is the quiet enemy of LED lighting systems. In field inspections, dusty heat sinks and blocked air gaps often raise housing temperatures within minutes. Keep fixtures away from insulation, leave ventilation paths open, and clean fins during scheduled maintenance. Small changes matter. The U.S. Department of Energy identifies thermal management as a major factor in LED performance and service life.
Use IES LM-80 data to judge lumen maintenance, not marketing claims. IES LM-80-21 requires measurements over time, commonly at 55°C and 85°C, with testing lasting at least 6,000 hours. Measurements should occur at intervals no longer than 1,000 hours. Record drive current and temperature carefully. A missed temperature reading can weaken the whole assessment.
Then apply IES TM-21-21 to project lumen maintenance from LM-80 results. Its projection limits prevent unlimited promises. For example, 6,000 hours of testing generally permits projection up to 36,000 hours. This is an estimate, not a warranty. Check actual fixture temperature with a thermocouple near the LED board. I once trusted a cool outer housing and ignored the hotter internal board. That mistake deserves attention. Maintenance teams should compare field measurements with the original LM-80 and TM-21 reports, replacing poorly ventilated components before light output visibly declines.
LED maintenance starts with a repeatable test, not a quick glance at a glowing fixture. In field inspections, I check startup time, visible flicker, dimming response, and unusual heat. I also compare light levels at the same points during every visit. Use a calibrated meter when possible. Small differences matter. Record room temperature, operating hours, and control settings. A loose connection can imitate a failed driver, so isolate power before opening equipment. Never trust memory.
Documentation should identify each fixture, location, installation date, test date, and observed condition. Add photographs of damaged lenses, dark segments, or discolored housings. Note measured illuminance and occupant complaints. ENERGY STAR service criteria can guide decisions about expected performance, testing, and replacement. Pair those criteria with approved service instructions and local electrical requirements. This is where many maintenance plans become vague. “Looks fine” is not a useful measurement.
Replace components when testing shows unsafe heat, repeated flicker, failed controls, unacceptable light loss, or performance outside the documented service threshold. Match each replacement component’s electrical ratings, thermal limits, dimming method, and photometric needs. Do not replace only the visible lamp when the driver is unstable. After replacement, repeat the same test and update the log. Keep removed parts for failure analysis when practical. I sometimes find that a new component exposes an installation problem. That result deserves documentation, not concealment. Schedule inspections by risk, usage, and access difficulty.
| No. | Maintenance Focus | Recommended Action | Test or Inspection Method | Typical Frequency | Acceptance Criteria | Replacement Trigger |
|---|---|---|---|---|---|---|
| 1 | Record the baseline condition | Create an asset register for each luminaire, driver, control device, installation location, rated power, color temperature, and installation date. | Visual verification and review of installation records, product labels, and commissioning measurements. | At commissioning and after any major modification. | Every installed asset has a unique identification number and complete technical record. | Replace missing or unreadable identification labels. |
| 2 | Clean optical surfaces | Remove dust, insects, grease, and other deposits from lenses, diffusers, reflectors, and protective covers using non-abrasive materials. | Visual inspection with the luminaire switched off; compare light output with the baseline condition. | Every 6–12 months; more often in dusty or oily environments. | No visible buildup, yellowing, cracking, or significant obstruction of the light path. | Replace cracked, severely yellowed, or permanently clouded optical parts. |
| 3 | Inspect heat dissipation | Keep heat sinks, ventilation openings, and surrounding surfaces clear. Confirm that airflow is not blocked by insulation, dust, or stored materials. | Visual inspection and thermal scan under normal operating load when overheating is suspected. | Every 6 months and after changes to the ceiling or enclosure. | Ventilation paths are open, and no abnormal hot spots or heat-related discoloration are present. | Replace a luminaire or thermal component if overheating persists after cleaning and airflow correction. |
| 4 | Check electrical connections | Inspect terminal blocks, wiring, grounding conductors, connectors, and junction boxes for looseness, corrosion, or heat damage. | De-energized visual inspection and torque verification performed by qualified personnel. | Annually or according to the site electrical safety program. | Connections are secure, insulation is intact, grounding is continuous, and no corrosion or overheating is visible. | Replace damaged connectors, conductors, insulation, or terminals. |
| 5 | Test operating current and power | Measure input voltage, operating current, and power draw to identify abnormal loading or driver deterioration. | Use calibrated electrical test instruments under normal operating conditions. | Annually and after driver or control-system changes. | Measurements remain within the equipment nameplate range and established baseline tolerance. | Replace the driver or affected assembly when readings are unstable, excessive, or outside the rated range. |
| 6 | Verify light levels | Measure illumination at representative work-plane points and compare results with the facility lighting design or applicable task requirements. | Use a calibrated illuminance meter at consistent measurement locations and conditions. | Annually and whenever occupants report insufficient lighting. | Average and minimum readings meet the approved project or task-lighting criteria. | Replace failed or substantially dimmed modules after cleaning and control checks. |
| 7 | Check flicker and visual comfort | Investigate visible flicker, stroboscopic effects, buzzing, or inconsistent dimming, particularly in work areas and near rotating equipment. | Observe at multiple dimming levels and inspect driver and control compatibility. | During routine inspections and whenever complaints occur. | No objectionable flicker, audible noise, unexpected shutdown, or unstable dimming is observed. | Replace incompatible or defective drivers, controls, or LED modules. |
| 8 | Test controls and sensors | Test occupancy sensors, daylight response, timers, dimming levels, emergency operation, and manual overrides. | Functional test in each operating mode; record response time and control behavior. | Quarterly for controls; monthly for emergency lighting checks where required by local rules. | Lights respond correctly, setpoints are maintained, and emergency functions operate as designed. | Replace failed sensors, batteries, relays, control modules, or damaged emergency components. |
| 9 | Inspect LED output and color consistency | Look for dark sections, flashing, color shift, uneven brightness, or failed LED packages across connected luminaires. | Visual comparison with adjacent fixtures and, when available, photometric or color measurements. | Every 6–12 months and during complaint investigations. | Light output is uniform, with no persistent flashing, dark spots, or unacceptable color variation. | Replace the LED module or complete luminaire when output degradation affects required illumination or appearance. |
| 10 | Document results and plan replacements | Log inspection dates, measurements, defects, corrective actions, parts used, technician details, and next service dates. | Review maintenance records and trend energy use, failures, light levels, and recurring faults. | After every service visit; formal review at least annually. | All defects are closed or assigned, records are traceable, and replacement parts are available for critical areas. | Replace components that are repeatedly failing, obsolete, unsafe, or no longer supported. |
Safety note: Electrical testing, de-energized inspections, emergency-lighting work, and component replacement should be performed by qualified personnel in accordance with applicable electrical and workplace-safety requirements.
LED lighting may use about 75% less energy. Treat this as a planning benchmark, not a promise. Actual savings depend on controls, schedules, daylight, and occupancy.
Record fixture wattage, operating hours, light levels, control settings, and room conditions. Include the inspection date. A simple spreadsheet helps reveal unusual energy use.
Measure illumination in the actual work area. Use the same measurement points during every visit. A calibrated meter improves consistency. Brightness alone can mislead.
Check for flickering, dark spots, loose connections, dusty lenses, and excessive heat. Also test startup time and dimming response. Small changes matter.
Dusty lenses reduce usable light, even when fixtures still operate. Clean them with a dry, soft cloth. Keep heat vents clear. Heat can shorten component life.
Identify each fixture, location, installation date, test date, and condition. Add light readings, photographs, repairs, and occupant complaints. Never trust memory.
Replace components after unsafe heat, repeated flicker, failed controls, severe light loss, or documented performance failure. Match electrical ratings, thermal limits, and dimming methods carefully.
Daylight, occupancy, seasonal conditions, and operating schedules can distort results. My first baseline ignored nearby windows. That comparison was incomplete. Review monthly readings before replacing healthy fixtures.
Repeat the original tests after installation. Check light levels, flicker, heat, startup, and dimming. A new part may reveal an installation problem. Document it honestly.
Learning how to maintain led lighting systems begins with establishing a clear performance baseline. Use a recognized target of approximately 75% energy savings compared with conventional lighting, then record operating hours, brightness, power use, and maintenance history. Regularly inspect lenses, drivers, wiring, connections, sensors, dimmers, and other controls to identify flickering, uneven illumination, overheating, or early electrical faults before they become larger problems.
Clean fixtures carefully with suitable, non-abrasive materials to preserve light output and prevent dust from reducing thermal performance. Heat management is equally important: keep ventilation paths clear and evaluate long-term lumen maintenance through established testing methods that measure performance over time. Finally, test the entire system on a planned schedule, document every inspection and repair, and replace components when they no longer meet established safety, efficiency, or illumination criteria. A consistent maintenance plan improves reliability, extends service life, reduces energy waste, and helps ensure stable lighting performance.
